Create Employee Schedule
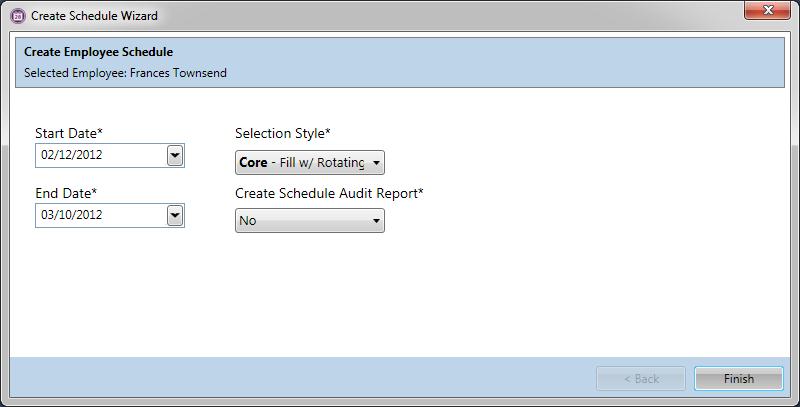
The Create Employee Schedule function opens a wizard used to run the scheduling process for a single employee.
To create an employee schedule, complete the following steps:
-
Click the name of the employee whose schedule you are creating.
The employee row is highlighted.
Tip
If you do not click an employee name first, the first employee listed on the schedule screen is automatically selected.
-
From the tool bar, click .
The Create Employee Schedule wizard appears.

-
Some fields are filled in for you. Update any prefilled fields and enter the necessary information in the remaining fields.
-
Start Date and End Date
The dates for the open schedule period appear but can be changed; however, both dates must fall within the open schedule period.
-
Selection Style
The default Selection Style appears, but a different one can be selected.
-
Create Schedule Audit Report
This option, when set to Yes, generates a report that tracks whether the employee was scheduled and any reasons that disqualified the employee from being scheduled. This report is viewed in the .
-
-
Click Finish.
When the process finishes, the schedule screen is updated with the results of the scheduling process.