Clear
The Clear schedule function opens a wizard used to clear employee schedules for the indicated time frame. Schedules can be cleared for the entire open schedule period or for a shorter time frame within the open schedule period.
To clear the activities from the schedule, complete the following steps:
-
From the tool bar, click .
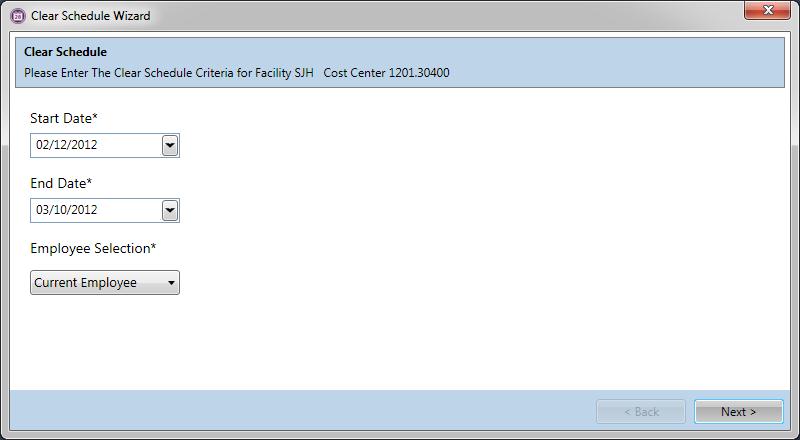
The Clear Schedule Wizard appears.

-
If needed, select a Start Date and End Date for the time frame to clear the schedule.
The start and end dates of the open schedule period appear by default but can be changed; however, both dates must fall within the open schedule period.
-
In the Employee Selection menu, select the option for the employees whose schedules will be cleared.
-
Current Employee - the employee highlighted on the schedule grid
-
Select Employees - choose employees from a list
-
-
Click Next and complete the steps from one of the following subheadings, depending on whether you selected Current Employee or Select Employees.
Current Employee
The employee's schedules appear, with individual rows for the different combinations of Location, Type, and Source.

-
Select the boxes for the rows of the schedules you need to clear.
-
Click Next.
-
To make changes to which schedules will be cleared, click Back and repeat steps 1 and 2.
-
When you are ready to clear the schedules, click Finish.
The schedules are removed from the schedule.
Select Employees
The employees from the schedule grid appear.

-
Select the boxes for the names whose schedules you need to clear.
-
Click Next.
-
Select the boxes for the rows of the schedules you need to clear.
-
Click Next.
-
To make changes to which schedules will be cleared, click Back and repeat steps 1 - 4.
-
When you are ready to clear the schedules, click Finish.
The schedules are removed from the schedule.